alarm lack-of-water
alarm lack-of-water
The Colormetry CMU 324 unit performs a self-diagnosis at regular intervals.
If the display shows error messages such as "Wash F: F265", "Injection F: F281" or "Wash Flow: F0866", although the pressure on the incoming water side is at a normal level and no other causes of water shortage are evident, the fine filter in the inlet part of the device could be clogged.
→ The fine filter cartridge must be checked and replaced if necessary
![]() The service life of the fine filter depends on the quality of the feed water and can not be precisely defined
The service life of the fine filter depends on the quality of the feed water and can not be precisely defined
Exchange as needed | if no alarm is displayed, the manufacturer's recommendation is: change filter once a year
workflow fine-filter replacement
workflow fine-filter replacement
- Close the ball valve in the water supply line.
- Press the "Buzzer Reset"-BUTTON to trigger a manual analysis to relieve water pressure from system.
- Approximately 15 seconds after pressing the "Buzzer Reset"-BUTTON, disconnect the system from power (disconnect the power supply).
- Disconnect the supply water tube from the filter housing.
To do this, press the release ring of the hose quick coupling and gently pull out the supply tube. If you pull the supply tube without pushing the release ring, the supply tube could rupture and tube material could block the quick-release coupling. If replacing the tube, the coupling may not work properly or close tightly. - Unscrew - with hand force - the filter unit from the Colormetry device.
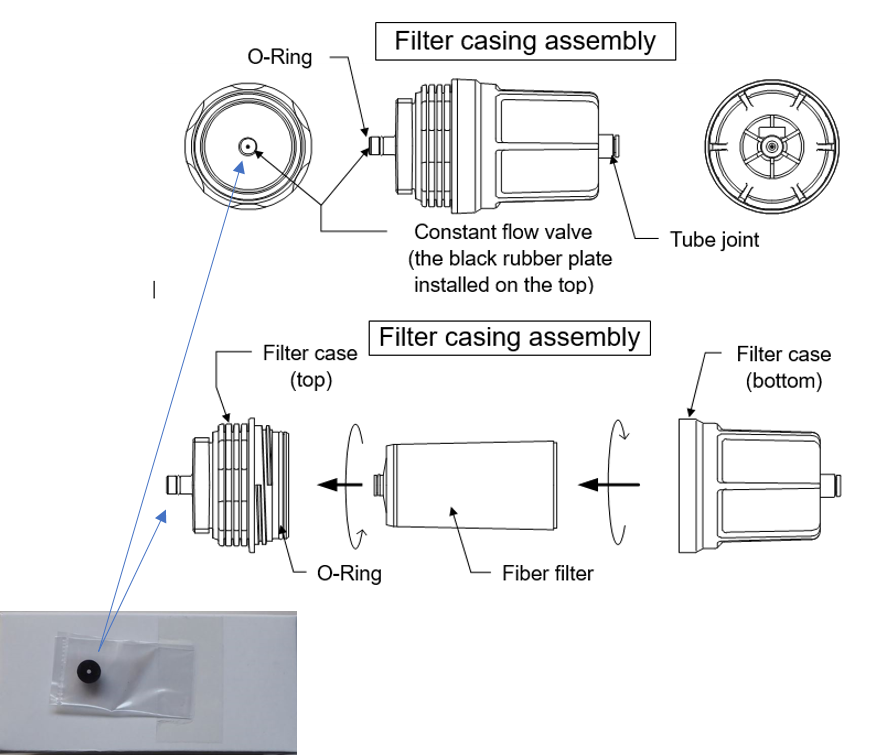
- Unscrew - with hand force - the two parts of the filter casing assembly and take out the used fine filter cartridge.
When removing the filter housing, pay attention to the small black rubber skrit, which is inserted as a constant flow valve in the pointed end of the upper part of the filter casing.
Gently remove the constant flow valve - it will be replaced by a new one. - Insert a new filter cartridge into the filter casing and screw both housing parts together again - with hand force.
- Insert a new rubber skrit in the pointed end of the top of the filter casing.
- Screw the filter casing assembly back into the colormetry housing - with hand force.
- Reconnect the supply water tube.
- Open the ball valve in the water supply line.
- Switch on the power supply of the device again.
→ the device starts automatically and carries out a self-diagnosis [refer to section "Commissining" STEP 08] - If necessary, deaerate the system and start the self-diagnosis again [refer to section "Commissioning" STEP 09]